Effortless DIY Ribbon Rose Bouquet: A Step-by-Step Guide + Tips!
Have you ever looked at a bouquet and thought, "I could make that"? The answer is a resounding YES! Crafting a DIY ribbon rose bouquet is more than just a hobby; it's an avenue to unleash your artistic spirit and transform ordinary ribbons into extraordinary displays of beauty.
There's an undeniable allure to handmade items. The ability to take a humble material like a ribbon and mold it into something elegant and eye-catching is empowering. This guide offers a pathway to creating ribbon rose bouquets that are not only visually appealing but also reflect your unique personality. The beauty of DIY lies in the individuality of each creation, ensuring no two bouquets are ever exactly alike.
Before we get into the specifics, it's important to understand why this project is a worthwhile endeavor. Ribbon roses possess a timeless charm, adding a touch of sophistication to any environment. They are also incredibly versatile, fitting seamlessly into various dcor styles. Best of all, they are cost-effective and can be customized to match your specific preferences. Whether you're a novice or an experienced crafter, this guide will assist you in creating a stunning masterpiece.
- 9xmovies Free Movie Downloads Legal Alternatives 2024 Guide
- Bollyflix Vip Your Gateway To Bollywood More Guide
| Category | Details |
|---|---|
| Concept | DIY Ribbon Rose Bouquet Creation |
| Skills Required | Basic crafting, patience, creativity |
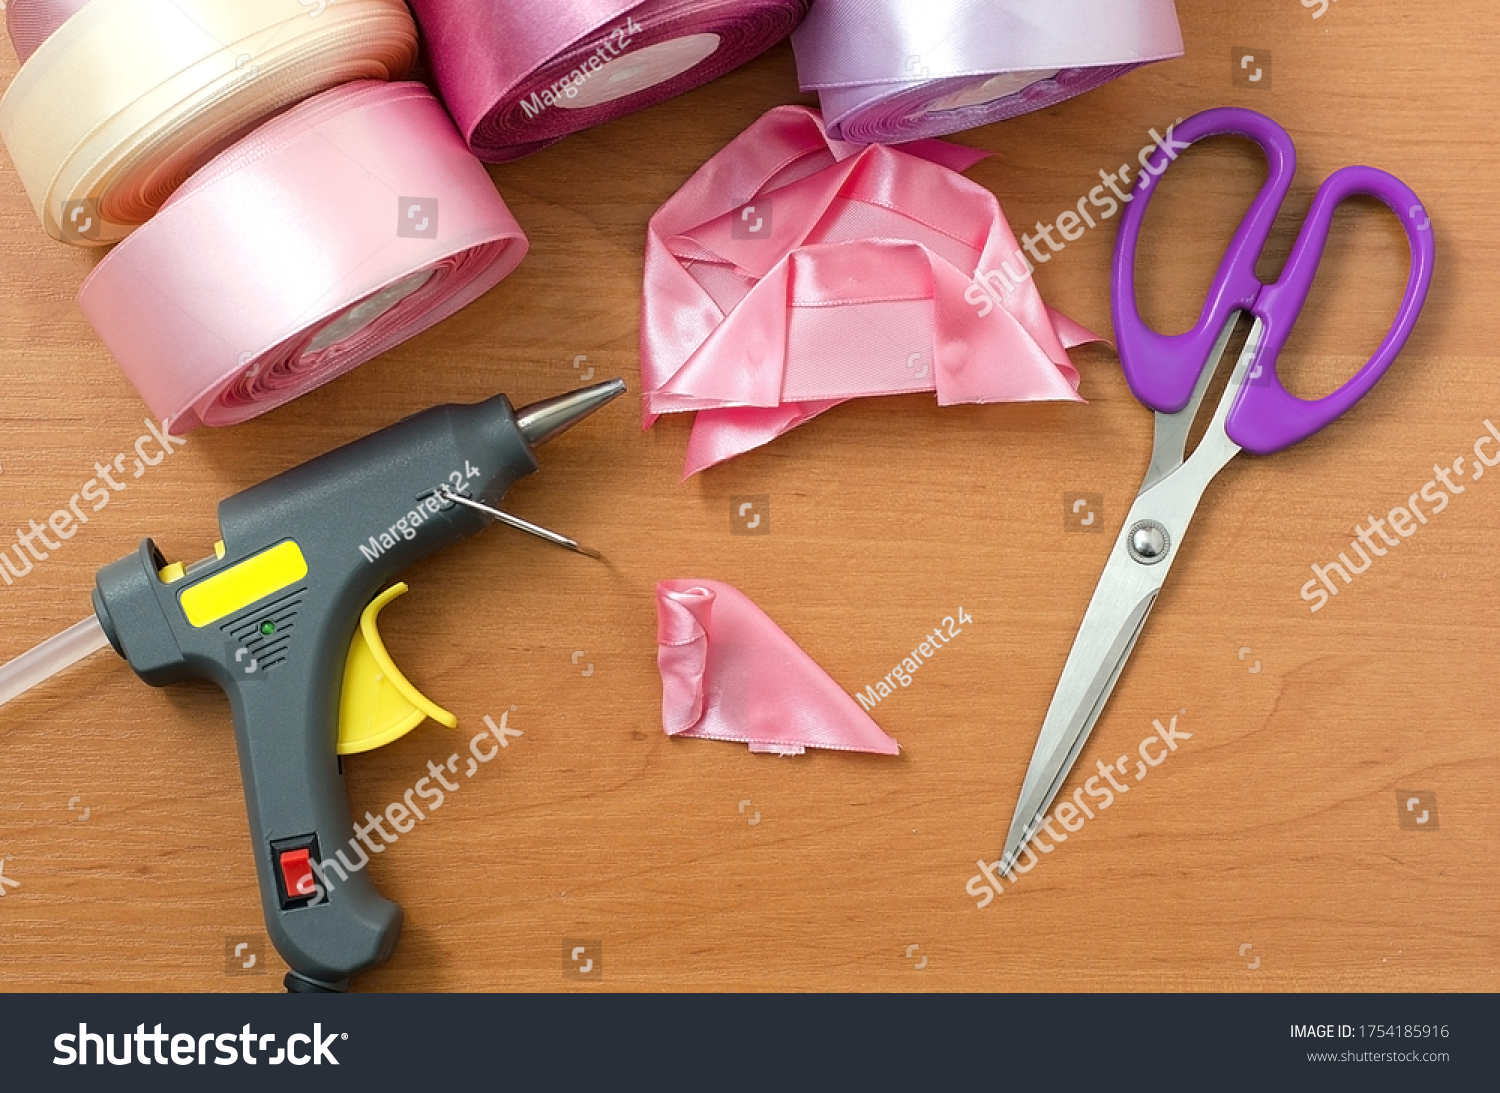
| Materials | Ribbons, floral wire, hot glue gun, scissors, floral tape, floral foam, green ribbon |
| Estimated Cost | $10 - $30 (depending on materials) |
| Estimated Time | 2-5 hours (depending on complexity) |
| Customization | Endless possibilities in colors, sizes, and arrangement styles |
| Durability | Long-lasting; does not wilt or require water |
| Ideal for | Weddings, home decor, gifts, special occasions |
| Difficulty Level | Beginner to Intermediate |
| Additional Benefits | Stress relief, creative expression, personalized decor |
| Authentic Website | Michaels - Ribbon Crafts |
What You’ll Need
The foundation of any successful project lies in having the right tools and materials. To craft a breathtaking DIY ribbon rose bouquet, you'll need the following:
- Ribbon: Opt for high-quality satin ribbons in colors that resonate with you. The ribbon's width dictates the size of the roses; narrower ribbons create smaller roses, while wider ribbons yield larger ones. Experiment with different widths to achieve varying visual effects.
- Wire: Floral wire or pipe cleaners provide the structural support needed to shape your roses. The wire allows you to mold and maintain the desired form of the petals.
- Hot Glue Gun: A non-negotiable tool for securely attaching the ribbon petals. A good hot glue gun ensures a strong and lasting bond, keeping your roses intact.
- Scissors: Sharp scissors are crucial for making clean, precise cuts in the ribbon. Dull scissors can fray the edges, resulting in a less polished final product.
- Floral Tape: This specialized tape is used to wrap the stems of your roses, concealing any wire and creating a neat, professional finish. It also provides a grip for assembling the bouquet.
- Floral Foam: If you're creating a bouquet with a base, floral foam is essential for holding everything together. It provides a stable foundation for arranging your roses and any accompanying greenery.
- Green Ribbon: This ribbon is used to wrap the stems of the bouquet, adding a finishing touch and covering any exposed floral tape or wire. It contributes to the overall aesthetic appeal.
If you find yourself lacking some of these materials, don't fret. Begin with the essentials and gradually acquire the rest as you progress. The most important thing is to immerse yourself in the creative process and explore different textures and colors.
Step 1
With your materials assembled, it's time to prepare the ribbon. This step is paramount as it lays the groundwork for your roses.
- New Hindi Movies 2025 Find Latest Releases Where To Watch
- Fry99 Your Ultimate Guide To Online Entertainment Must Read
Begin by cutting your ribbon into strips. The length of each strip depends on the desired size of your roses. For petite roses, cut the ribbon into 6-inch strips. For larger, more dramatic roses, aim for 10-12 inches. Remember, the length of the ribbon directly correlates to the size of the rose. The longer the ribbon, the larger the rose.
Next, fold each strip into a loop, forming the petal shape. Feel free to experiment with different folding techniques to achieve diverse textures. Some artisans prefer to slightly twist the ribbon for a more organic, natural look. Ultimately, it's about personal expression and achieving the aesthetic you envision.
Pro Tip
Not all ribbons are created equal; each possesses unique qualities. Satin ribbons are a popular choice for ribbon roses due to their ability to maintain their shape and their luxurious sheen. However, don't limit yourself to satin. Explore other ribbon types, such as chiffon or organza, for a softer, more ethereal look. Combining textures can infuse depth and visual interest into your bouquet, elevating it from simple to spectacular. Consider velvet for a richer, more opulent feel or burlap for a rustic, charming aesthetic. The possibilities are endless, limited only by your imagination.
Step 2
With your ribbon prepared, it's time to embark on creating the heart of your rose. This is where the transformation truly begins.
Take a piece of floral wire and wrap one end with floral tape. This creates the stem of your rose, providing both structure and a means of attachment. Next, take your first ribbon strip and secure it to the center of the wire using a dab of hot glue. This initial strip forms the core of your rose.
Begin wrapping the ribbon around the center, carefully layering each strip to create the petals. Use your fingers to gently shape each petal as you go. This is where your artistic flair comes into play, allowing you to personalize each rose. Some prefer uniformly shaped petals, while others embrace a more free-form, untamed look. There is no right or wrong approach; it's all about capturing the essence of beauty in your own unique way.
Common Mistakes to Avoid
One of the most common pitfalls for beginners is overusing glue. While glue is necessary for securing the petals, excessive amounts can render your roses stiff and unnatural. Strive for a delicate balance, using just enough glue to hold the petals in place without compromising their flexibility. Another common mistake is neglecting to properly shape the petals. Take your time and carefully adjust each petal until it achieves the desired form. Remember, attention to detail is key to creating realistic and beautiful ribbon roses.
Step 3
Now that you've established the base of your rose, it's time to add layers, giving it fullness and dimension. This step is crucial for achieving a visually appealing and lifelike bloom.
Take another ribbon strip and begin wrapping it around the base, slightly overlapping each layer to create a natural, cascading effect. As you add more layers, the rose will gradually take shape, revealing its unique character. Don't hesitate to experiment with different colors and textures to create a gradient effect, adding depth and visual intrigue.
Once you're satisfied with the fullness of your rose, trim the bottom to create a flat surface. This facilitates easy attachment to the bouquet later on. You can also wrap the stem with floral tape for a cleaner, more refined finish.
Pro Tip
Incorporating a variety of colors can dramatically enhance the visual appeal of your bouquet. For instance, you can create a captivating gradient effect by starting with a light color at the center and gradually transitioning to a darker shade on the outer petals. This technique adds depth and sophistication, drawing the eye and creating a focal point. Don't be afraid to explore contrasting colors or complementary hues to achieve a truly unique and personalized bouquet.
Step 4
With your ribbon roses complete, the moment has arrived to assemble your bouquet. This is where the individual elements come together to form a cohesive and breathtaking display.
Begin by arranging your roses in a way that pleases your eye. Experiment with different placements, mixing and matching sizes and colors to create a balanced and harmonious composition. Once you're satisfied with the arrangement, use floral tape to secure the stems together, holding your bouquet in place.
If you're incorporating floral foam, place it in a vase or container and insert the stems of your roses. This will keep your bouquet upright and stable, preventing it from toppling over. You can also add greenery or filler flowers to complement your roses and enhance the overall aesthetic.
How to Choose the Right Arrangement
When assembling your bouquet, take into consideration the occasion and the setting in which it will be displayed. For a formal event, a symmetrical arrangement with uniform roses may be most appropriate. For a more casual setting, an asymmetrical arrangement with varying sizes and colors can create a more relaxed and inviting atmosphere. Ultimately, the best arrangement is one that reflects your personal style and captures the essence of the occasion.
Step 5
No bouquet is truly complete without those all-important finishing touches. These details add a layer of refinement and polish, elevating your creation from simple to spectacular.
Use green ribbon to wrap the stems of your bouquet, concealing any exposed wires or tape and adding a decorative element. You can also add a bow or ribbon at the top of the bouquet for an extra touch of elegance, creating a focal point and adding visual interest.
Once your bouquet is complete, take a step back and admire your handiwork. You've created a stunning piece of art that is entirely unique to you, a testament to your creativity and skill.
Pro Tip
Bows can dramatically alter the overall aesthetic of your bouquet, adding either a playful or sophisticated touch. Experiment with different shapes and sizes to determine what complements your design best. A large, flamboyant bow can make a bold statement, while a small, delicate bow can add a touch of understated elegance. Consider the occasion and the overall style of the bouquet when selecting your bow.
Expert Tips for Creating a Stunning Ribbon Rose Bouquet
Now that you've mastered the basics, here are some expert tips to elevate your ribbon rose bouquet to the next level:
- Practice Makes Perfect: The more you practice, the more skilled you'll become at creating ribbon roses. Don't be discouraged if your initial attempts don't meet your expectations. Embrace the learning process and keep honing your skills.
- Invest in Quality Materials: High-quality ribbons and tools can significantly impact the final result. Opt for durable, well-made materials that will stand the test of time and create a polished, professional look.
- Experiment with Colors and Textures: Don't be afraid to try new things and push the boundaries of your creativity. Explore different color combinations, ribbon textures, and arrangement styles to create a truly unique and personalized bouquet.
- Take Your Time: Crafting is a process that should be enjoyed. Rushing can lead to mistakes and a less-than-satisfactory result. Allow yourself ample time to immerse yourself in the creative process and let your imagination flow freely.
Remember, the key to creating a stunning DIY ribbon rose bouquet is to have fun and embrace your creativity. There's no right or wrong way to express yourself, so let your individuality shine and create something truly special.
Common Questions About DIY Ribbon Rose Bouquets
Q
Absolutely! While ribbon is the most common material for ribbon roses, fabric can also work beautifully. Just ensure that you choose a lightweight fabric that holds its shape well. Fabrics like cotton, linen, or even lace can create stunning and unique ribbon roses.
Q
Ribbon roses, unlike their fresh counterparts, can last indefinitely with proper care. They won't wilt or fade over time, making them a long-lasting and cherished keepsake. To keep them looking their best, avoid exposing them to direct sunlight or excessive moisture.
Q
Of course! One of the greatest advantages of DIY projects is the ability to customize them to your liking. You have complete control over the colors, textures, arrangement styles, and overall aesthetic. Let your imagination run wild and create a bouquet that is uniquely yours and perfectly reflects your personal style.
- Filmyfly Your Gateway To Hollywood Bollywood Year
- Fry99com Your Guide To Online Gaming Entertainment 2024
Stepbystep Instruction Rose Made Satin Ribbon Stock Photo (Edit Now

DIY Ribbon Flower Bouquet

8 Roses Bouquet, Roses Bouquet, Satin Ribbon Rose Bouquet, Happy
